


Apple has some impressive new Accessibility features coming soon called Personal Voice and Live Speech that allow anyone to create and securely store a replica of their voice and use it via text with their iPhone (or iPad). Ahead of the official fall release, the voice banking feature is available with the iOS 17 beta. Here’s how to set up Personal Voice on iPhone.
This story is supported by Mosyle, the only Apple Unified Platform. Mosyle is the only solution that fully integrates five different applications on a single Apple-only platform, allowing businesses and schools to easily and automatically deploy, manage, and protect all their Apple devices. Over 38,000 organizations leverage Mosyle solutions to automate the deployment, management, and security of millions of Apple devices daily. Request a FREE account today and discover how you can put your Apple fleet on auto-pilot at a price point that is hard to believe.

With Personal Voice, users can save their voice in about an hour when that normally takes weeks, not to mention traditional voice banking is a costly service.
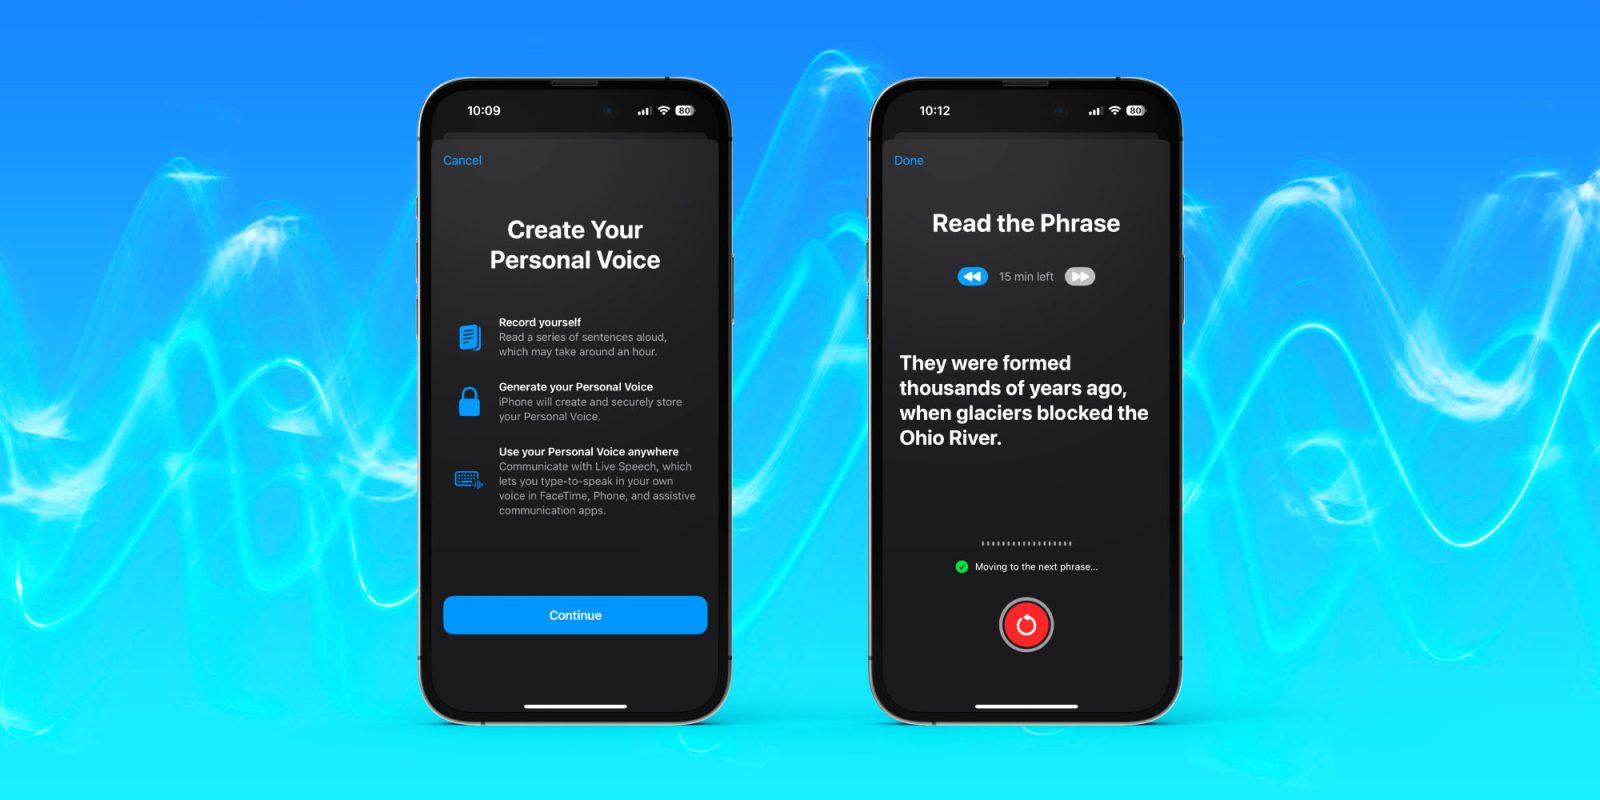
Personal Voice on iPhone has you read a series of random sentences. It needs a total of 15 minutes of you speaking – Apple notes that it may take “around an hour” to complete the whole process.
But the great part is you can do this in chunks, whenever you need to stop, your progress is saved and you can continue when it works.
Personal Voice on iPhone or iPad is a very valuable feature for those with ALS (amyotrophic lateral sclerosis) and other health conditions that can impact the ability to speak.
But even for healthy individuals, it’s useful to set up to preserve your voice for the future – kind of like free voice insurance. Apple highlights Personal Voices are securely stored on iPhone.
Once created, the new Live Speech feature lets users type-to-speak with FaceTime, Phone, and third-party apps that support assistive communication.
How to set up Personal Voice on iPhone with iOS 17
iOS 17 is currently in beta. Read more on how to install the software if you’d like to test out features like Personal Voice and more.
- On your iPhone running the iOS 17 beta, open the Settings app
- Swipe down and tap Accessibility
- Swipe down again, under Speech, choose Personal Voice
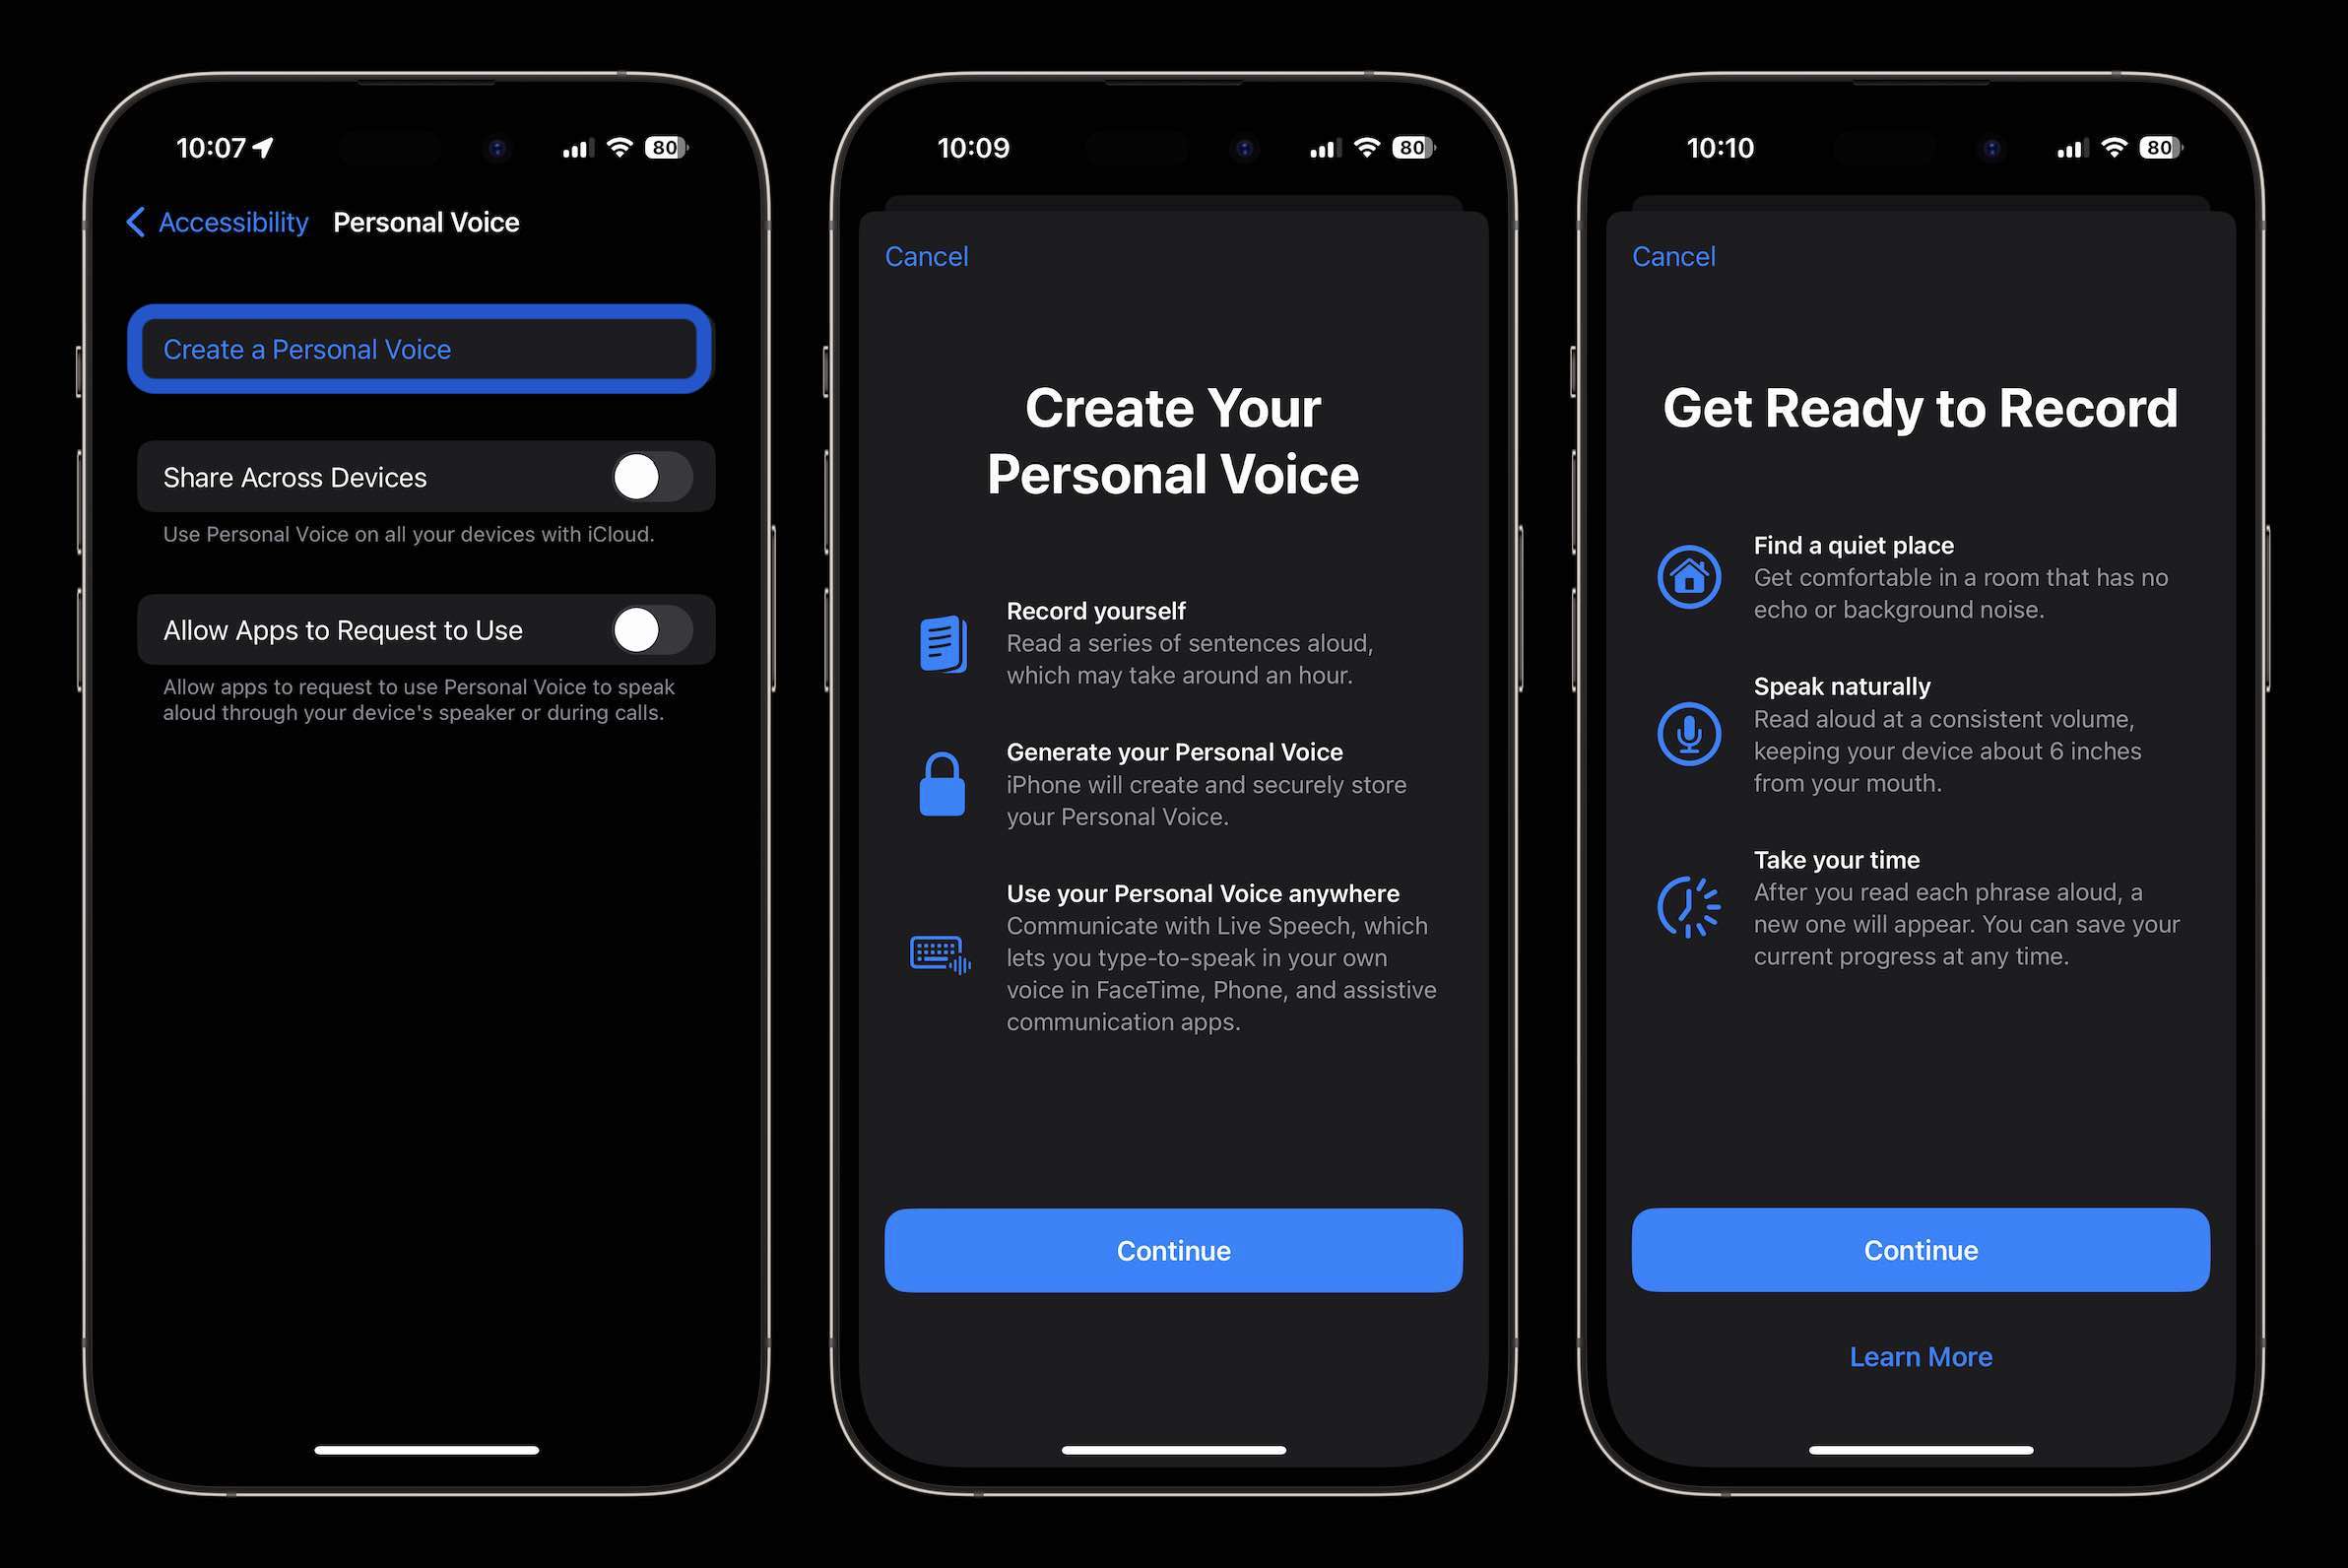
- Tap Create a Personal Voice
- Make sure to follow the prompts like recording in a quiet place, holding your iPhone “about 6 inches from your mouth,” and speaking naturally
- Conveniently, you can start the process and stop at any time and come back to finish setting up Personal Voice
- If you’re having trouble getting the feature to finish processing, try plugging in your iPhone overnight with a wired cable instead of using wireless charging.
Here’s how it looks to set up Personal Voice on iPhone:

Along with starting the process to create a Personal Voice, you can choose to share it across your Apple devices and enable third-party apps to use Personal Voice.
To start, you name your voice or you can use the default, then you’ll do a sound check.
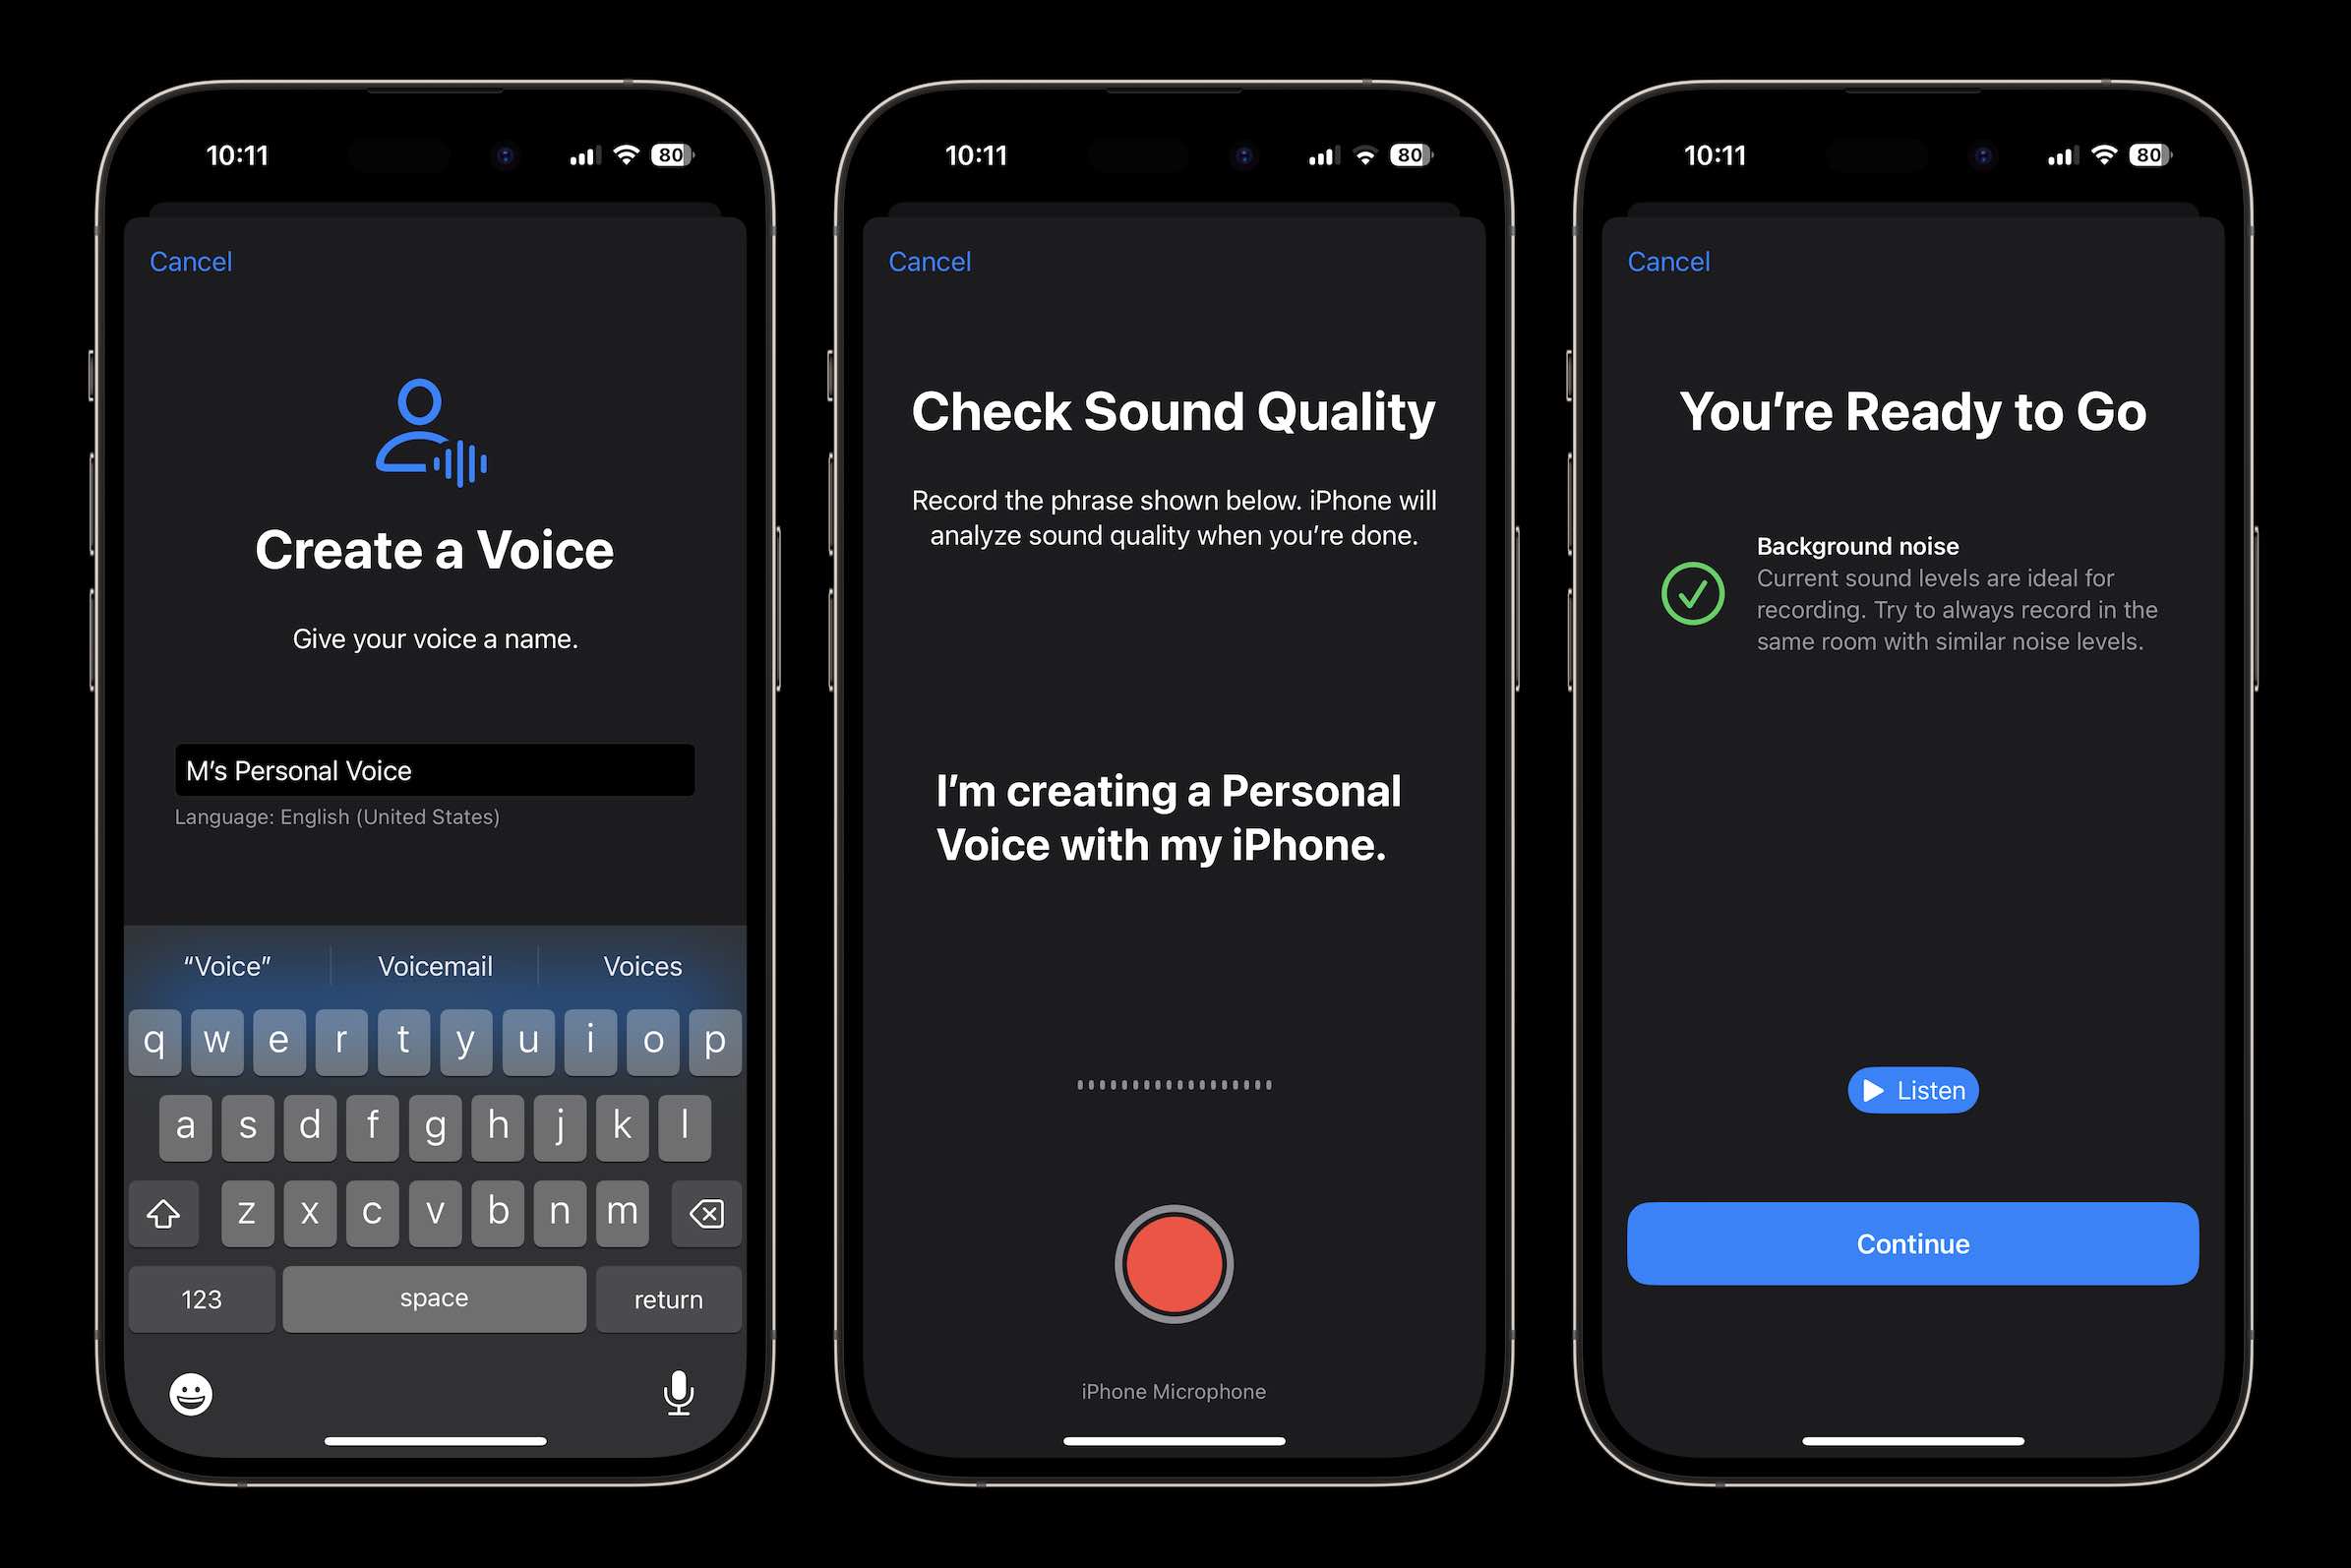
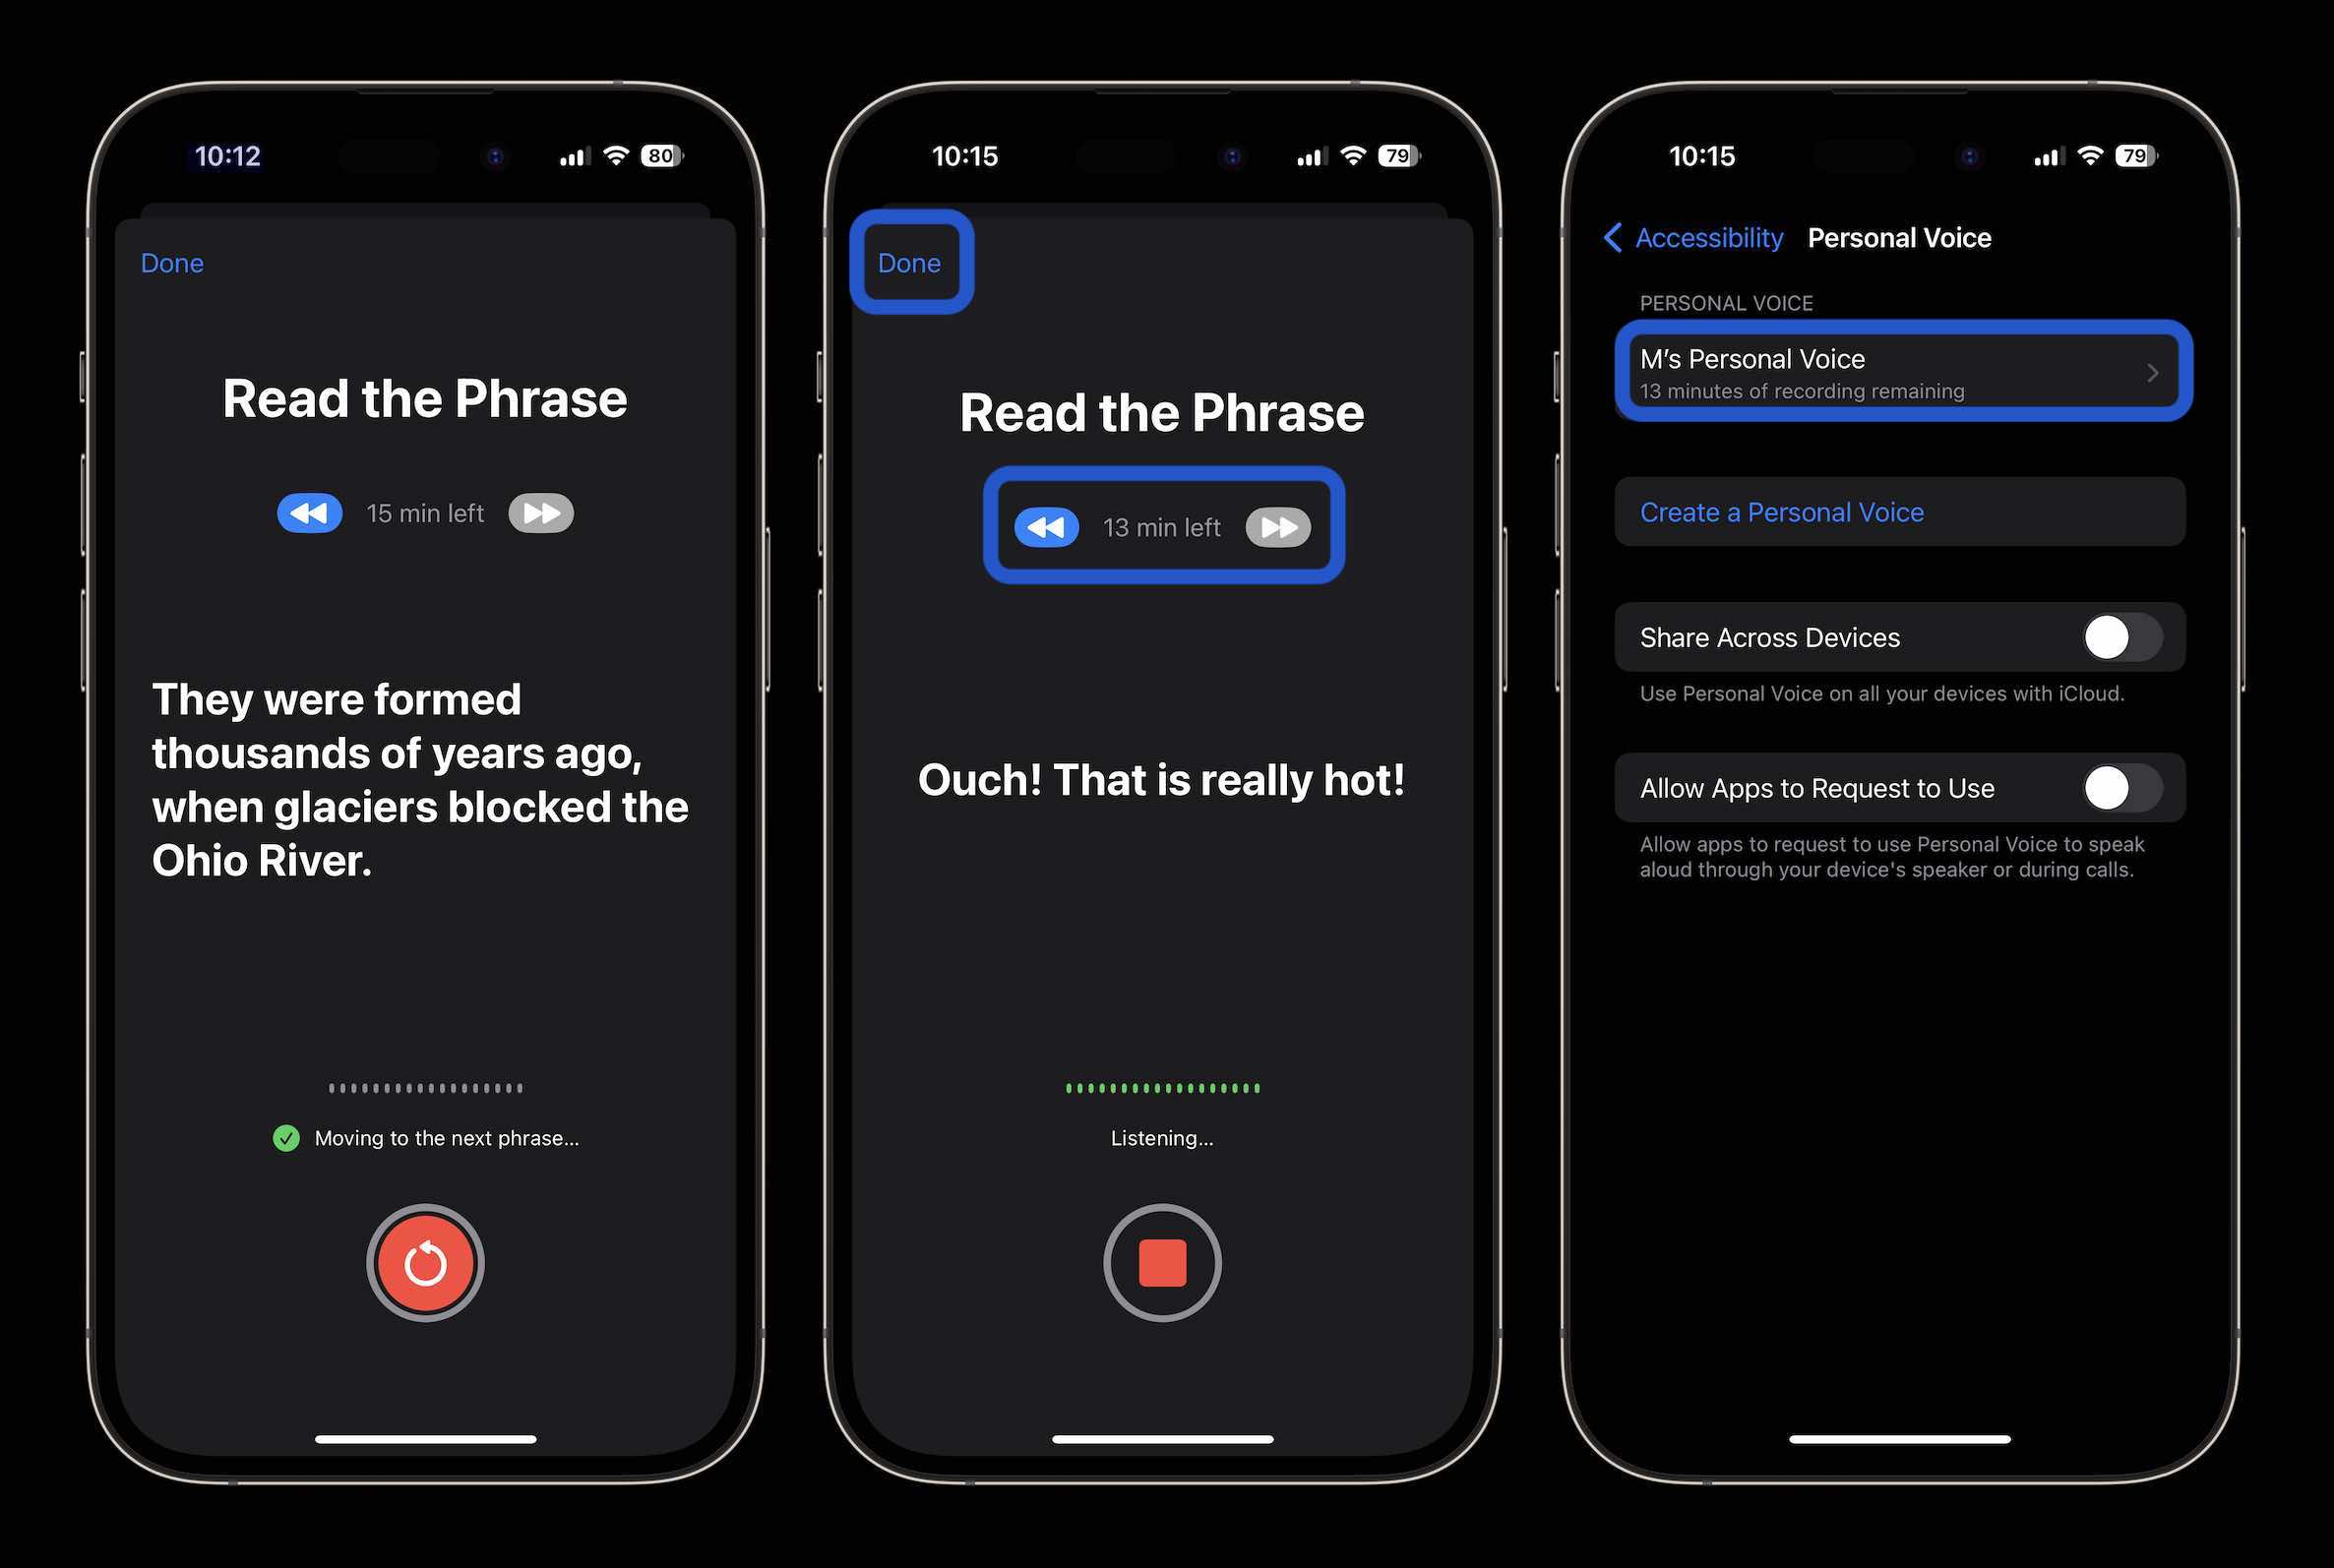
Once you start recording, the process will automatically move from one phrase to the next.
Tap Done in the top left corner at any time to save your progress and return later. You can also tap the back arrow to return to a previous phrase.
After setting up Personal Voice, you can enable Live Speech under Settings > Accessibility with a triple-click shortcut.

0 comments:
Post a Comment