These are instructions on how to jailbreak your 2.0, 3G iPhone using Windows and WinPwn. The latest version of WinPwn does include the Installer app.
Please keep these notes in mind...
- You MUST do a full uninstall of winpwn before installing the new version
- Make sure you have the latest version of iTunes ( Currently 7.7)
- WinPwn uses 300MB of ram at peak due to the ipsw being extracted in memory
- You must first click browse and load an IPSW to use WinPwn (i thought this was clear)
- For 2.0 only the *5A347_Restore.ipsw files are valid. The 345 image will not work
- If you see Failed to load image catalog/payload catalog, this is fine and won't cause problems
- If you already have service with AT&T do not activate or install Youtube Fix
To follow this tutorial you will need to have iTunes 7.7 installed (make sure to reboot). Also, you may need to download and install .Net Framework http://www.microsoft.com/downloads/details.aspx?familyid=0856eacb-4362-4b0d-8edd-aab15c5e04f5&displaylang=en
if you are on Windows XP.
Step One
Create a folder on your desktop called Pwnage. In it place Winpwn 2.0.0.4 http://rapidshare.com/files/136074645/winpwn_2.0.0.4_Setup.zip.html and the latest 2.0 firmware. http://appldnld.apple.com.edgesuite.net/content.info.apple.com/iPhone/061-5134.20080729.Q2W3E/iPhone1,2_2.0.1_5B108_Restore.ipsw
Step Two
Install WinPwn by extracting the downloaded zip from Step One and running the setup executable. Once WinPwn has been installed it will put a shortcut icon on your desktop. Double click to launch the application.
Step Three
Once WinPwn has opened click the Browse .ipsw button.
Step Four
Locate the 2.0 firmware file (iPhone1,2_2.0.1_5B108_Restore.ipsw) from the Pwnage folder on your desktop and click Open.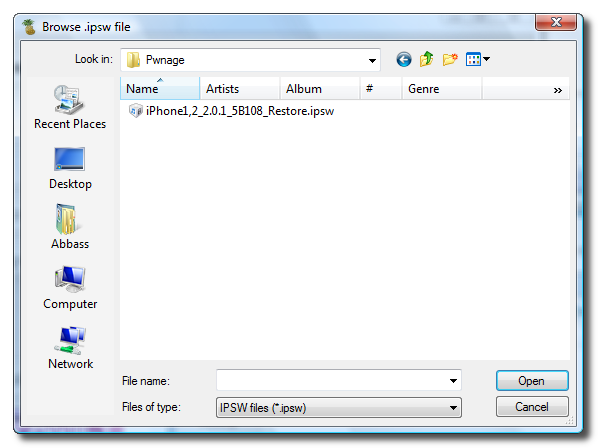
Step Five
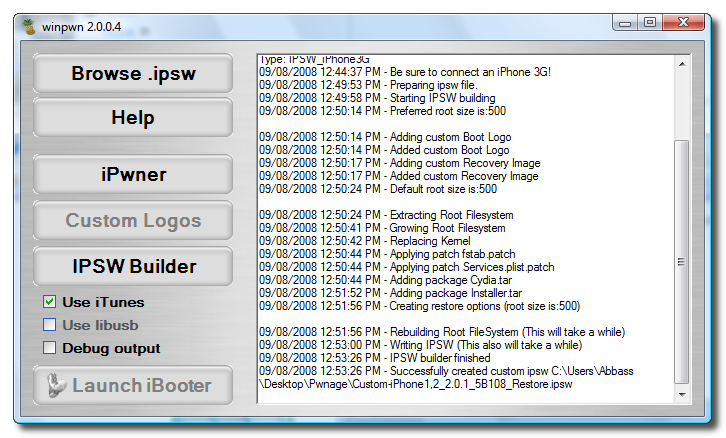
WinPwn will check the firmware to make sure its valid. Now click the IPSW Builder button.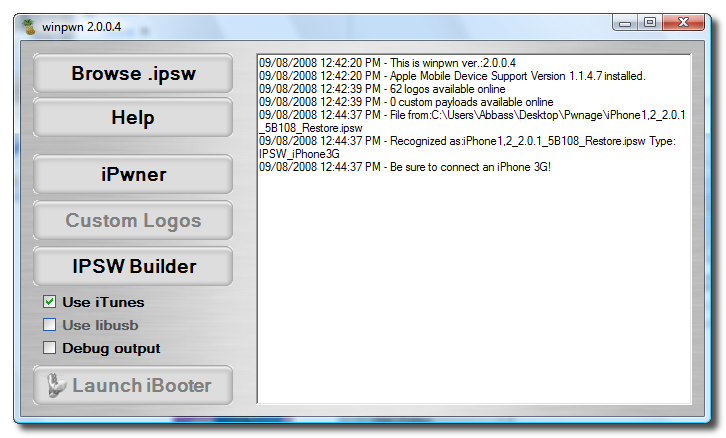
Step Six
The IPSW Builder window will open to the Applications tab. Check to select Cydia and if you are not on AT&T then check to select YouTube Fix. 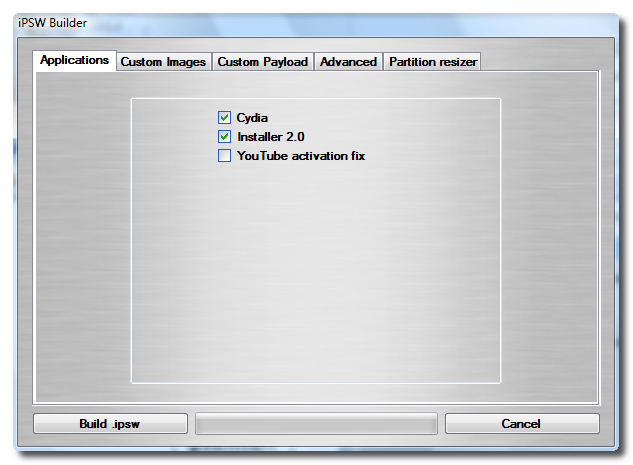
Step Seven
Click to select the Custom Images tab. From here you can can select
your own boot images.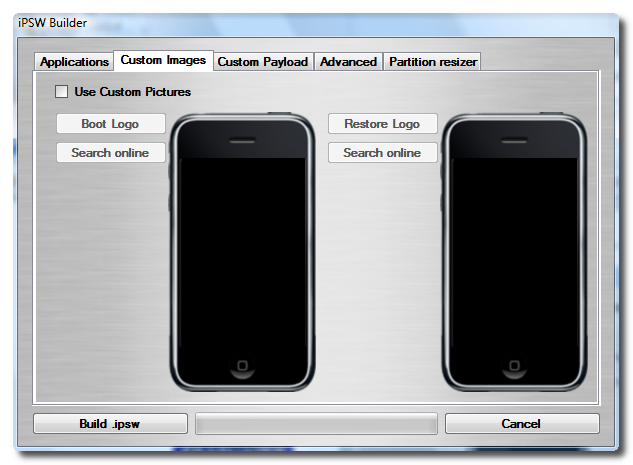
Remember the rules for them: RGB or Grayscale format with Alpha channel and dimension bellow 320x480. If you would like to use the iClarified ones they can be found here: Boot Logo, Recovery Logo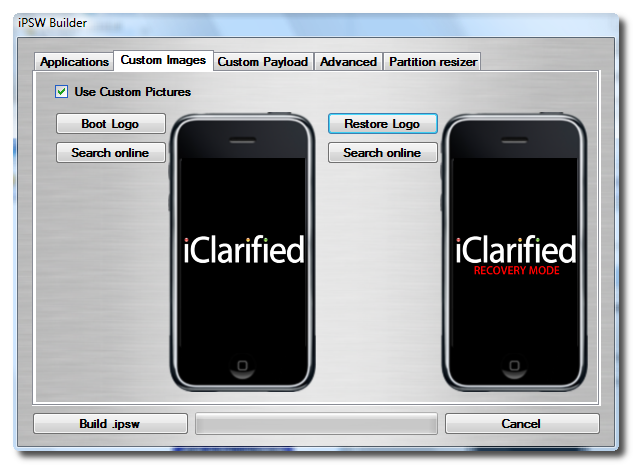
Step Eight
Click to select the Custom Payload tab. From this tab you can select custom payloads you have created to be automatically installed. We will discuss this in a future tutorial.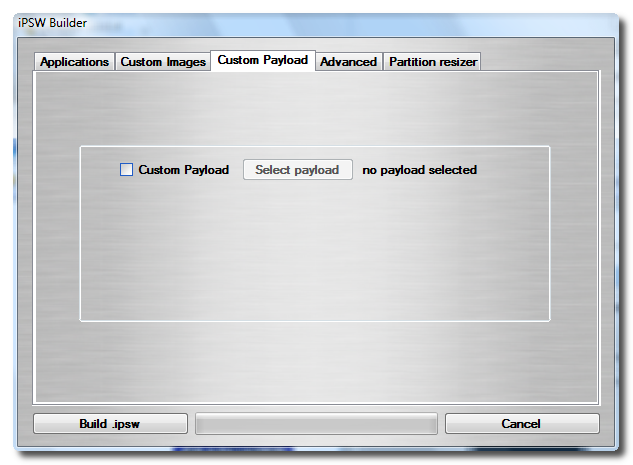
Step Nine
Click to select the Advanced tab. Check to select: Activate Phone.
NOTE*: Deselect Activate if you have an iPhone legitimately activated on an official carrier.
*****FOR THE PARTITION SIZER, SET IT TO 512MB!!! IF YOU DO NOT SET IT TO SOMETHING ABOUT 500MBS, IT WILL NOT WORK*****
Step Ten
Click the Build .ipsw button at the bottom left to build your custom ipsw firmware file. Navigate to your Pwnage folder and click the Save button.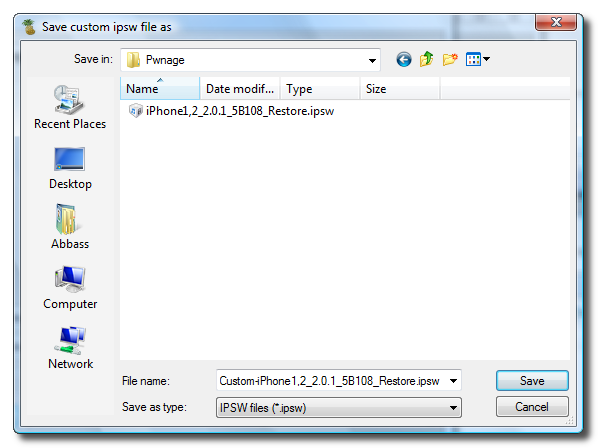
Step Eleven
Once WinPwn has finished creating your custom firmware then click the iPwner button from the main menu.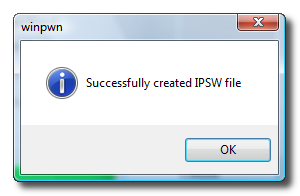
Step Twelve
Select the custom firmware file we just built from the Pwnage folder on your desktop and click the Open button.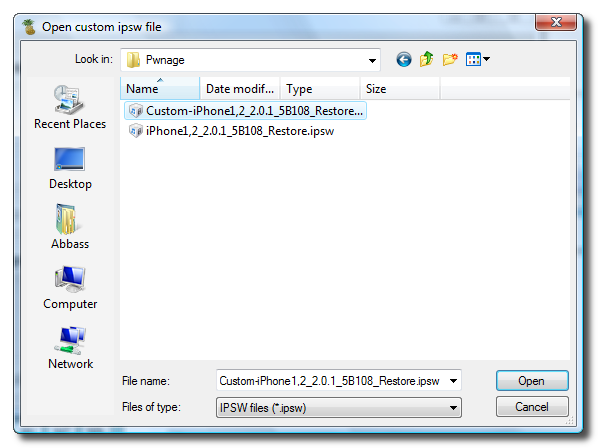
Step Thirteen
You will then be notified that your iTunes has been Pwned!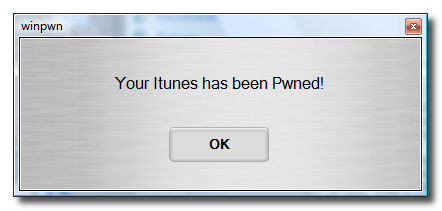
Step Fourteen
Next we will need to put the iPhone in the DFU mode and restore using iTunes. To put your iPhone into DFU mode please follow these http://www.iclarified.com/entry/index.php?enid=1034 instructions!
Step Fifteen
iTunes will prompt you that you are in recovery mode.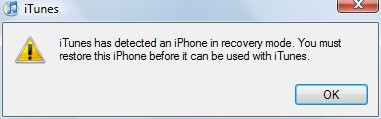
Hold down Shift and click the Restore button in iTunes.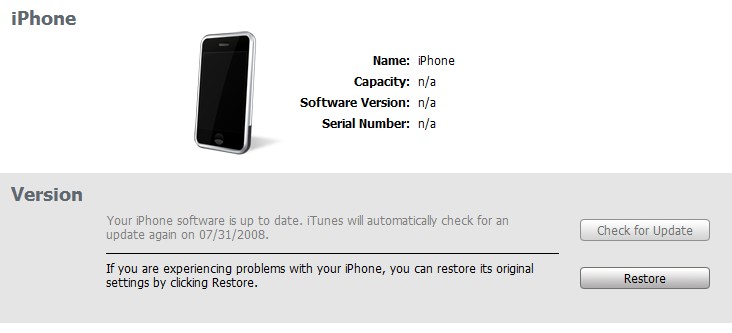
A popup window will appear asking you to select your firmware. Select the Custom firmware file we saved in the Pwnage folder and then click the Open button.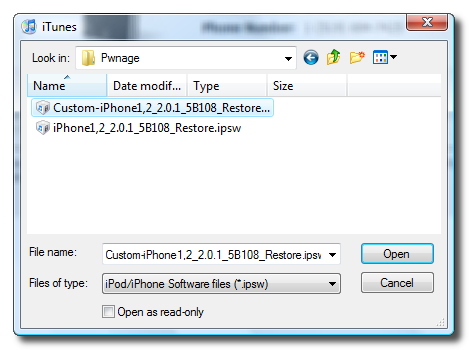
Your iPhone will now be restored to the jailbroken 2.0 firmware!


Orkut's #1 and the most popular iPhone community now on Facebook ! This Group Is dedicated To All Those Who Have Apple iPhone, iPod Touch or iPad. Join This Group And Share Ur Views Issues And Solutions. Our Cydia Source is DeadMan.myrepospace.com

0 comments:
Post a Comment